Progress update 2
Posted: 25 March 2009 Filed under: Masters Leave a commentSlide 1
Slide 2
Slide 3
Slide 4
Slide 5
Slide 6
Slide 7
Slide 8
Slide 9
Slide 10
Slide 11
Midi update
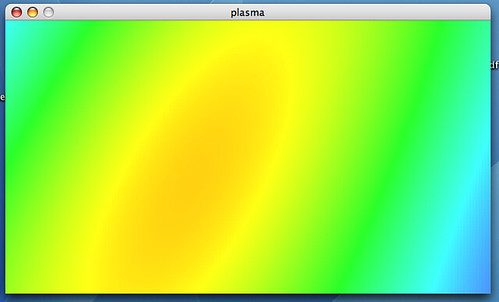
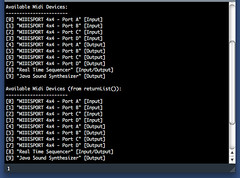
Posted: 22 March 2009 Filed under: Masters, Negotiated Practice B | Tags: Masters, midi, processing Leave a commentI’ve been a bit lapse in charting my progress in this……mainly coz my progress has been pretty slow in my opinion. Anyways, I’ve been working on doing the visuals mainly coz I’ve not been able to get Processing to talk to the midi controller and I’ve not been able to get over to the lab to spend any amount of time to work out why, until today. I essentially removed everything (Processing, all of its midi libraries and mmj), re-installed it all and it worked. Using scripts provided with the libraries I was able to list the midi controller and I knocked up a test which wrote coloured circles to the stage depending on the values obtained which you can see below. So now i just need to put it all together with my existing scripts, write some more and then do a test with the skeleton.


Some inspiration
Posted: 22 March 2009 Filed under: Adaptive Games Systems, Masters Leave a commentThe Little Professor MP3 player
Furby Robot hack
Reconfigurable House
Furby controlled by bluetooth
Furby hack contest
GraffitiWriter
Furby update
Posted: 20 March 2009 Filed under: Adaptive Games Systems, Masters | Tags: furby, Masters Leave a commentAll the furbies I got from eBay have arrived although 3 weren’t as advertised. They were essentially beanie babies so I complained and got the guy to give me a full refund…..which I used to buy 2 more. This is possibly getting a bit obsessive. I’ve also ordered an ir tester from Maplins so that I can at least prove (if only to myself) that the transmission is working. So anyway, here’s a foto of all my new furbies

Get in!!!
Posted: 11 March 2009 Filed under: Adaptive Games Systems, Masters | Tags: furby Leave a commentJust got 3 more furbies off of eBay!!
YES!!!
Posted: 10 March 2009 Filed under: Adaptive Games Systems, Masters | Tags: furby Leave a commentI lost out on 2 but I won 2. Three more to go – exciting stuff eh!
eBay
Posted: 10 March 2009 Filed under: Adaptive Games Systems, Masters | Tags: furby Leave a commentThere’s some furbies for sale on eBay and I’m currently bidding for 7. Keep everything crossed!
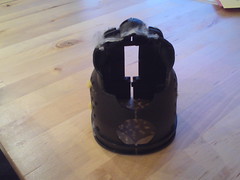
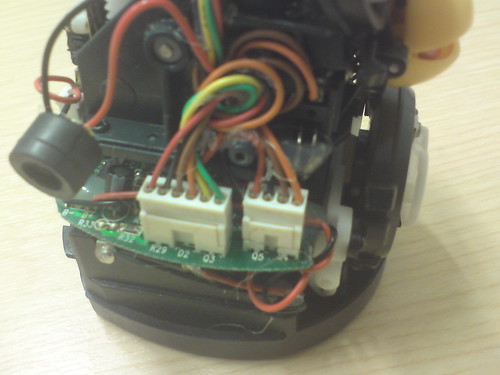
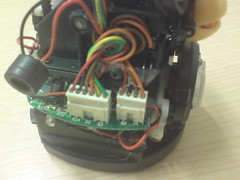
Cable trace
Posted: 8 March 2009 Filed under: Adaptive Games Systems, Masters | Tags: furby Leave a commentWith the help of the circuit diagram and the stripped furby, I think I’ve managed to isolate the wires to the ir sensors which are on the larger block on the left in the photo below. The wires from the speaker are a bit harder coz they’re red, orange, black and brown so they could be in the same block or the one on the right….or even in a smaller block on the other side of the furby. As this is my broken one, I can’t just pull the blocks out and see what happens. I NEED more furbies!!
Greenwood 2.0
Posted: 7 March 2009 Filed under: Ramblings | Tags: greenscreen, greenwood, poetry Leave a commentLast night saw the launch of a project I’ve been working on called Greenwood 2.0 which is a virtual version of Mark Greenwood. Using the processes he uses to write his poems, I translated them into code to produce a generative piece that’s displayed on the GreenScreen. More details can be found on the project site here. And see what the BBC and The Herald had to say about it.
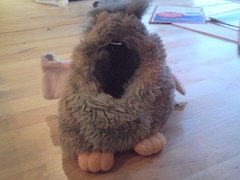
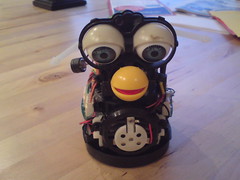
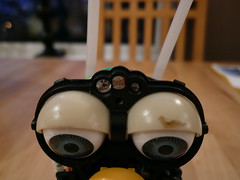
Furby skinning
Posted: 1 March 2009 Filed under: Adaptive Games Systems, Masters | Tags: furby Leave a commentFinally managed to skin a furby and you can see the results below. The blurred close up is of the infra-red sensors in the forehead of the furby. One transmits and the other receives, once I’ve isolated them and worked out how the speech is generated then I should be loads closer to having my network up and running.
During my research, I unearthed a furby circuit diagram which I’ve been studying. I think I’ve managed to workout which are the sensors and I’ve been tracing them to other parts of the circuit. Now I just have to workout what they are on the furby itself!